


Eco-Friendly Cab Options in Patna: A Sustainable Travel Choice
Bihar Trip
- Feb 25, 2025
- 1850
- 1
Light painting, which includes painting light, is a completely fun process. If you are trying to add a touch of originality on your photos, mild portray is for you ...
The precept is as follows: you may factor a flashlight toward your digicam and will draw shapes for the duration of exposure of your image.
As announced above, there may be no photomontage to reap this sort of picture. All the conclusions of this effect may be done at some point in the taking pictures (besides likely to accurate the publicity of your photograph).
Light portray requires the following equipment:
A digicam of course! Since it is essential to paintings with exposure times of several seconds, it's far vital to have a tool this is designed ageable, that is to say, that allows guide adjustment of the publicity time.
A tripod
A bendy cause with remote control (essential in case you are alone).
A lamp. No matter the model. You also can use several to differ the results of shade, power, and shape.
You will, consequently, ought to regulate your case to have a gap time of several seconds. There are two strategies for this:
You have a bendy trigger with far-flung control: set your digital camera to pose B (bulb).
You do not have a flexible trigger: in this case, transfer your digital camera to manual mode (M), set a speed of 15 to 30 seconds and set the self-timer.
Adjust the alternative shooting parameters as follows:
Close the establishing (f 9) for example. If, as in my example, you need to take a photograph or it isn't always absolutely dark, near the aperture as some distance as possible (here f 22).
Set the sensor sensitivity to ISO 100.
Mount your camera in your tripod and determine the framing.
Get in the vicinity and press your cause. Turn on your lamp and direct the mild beam towards your box.
Take the first photograph without gambling with the lamp to make sure that your publicity time and your commencing are accurate. If your picture is too dark, increase the aperture value.
Think in advance about the drawing you want to make and set benchmarks for your decor (consider that it's far rather hard to draw whilst you do no longer see what you're drawing).
Feel free to transport whilst you draw. If you don't, a ghost shadow may seem and the effect can be less successful. It is for this reason that I recommend which you have a fairly lengthy publicity time, even if your drawing takes only three or 4 seconds to be produced.
If you decide to place someone on your realization, positioned a flash to make them visible.
If you need to do the light portray in large daylight, in this case, use an impartial density filter.
On the alternative hand, if you search for this term on your APN, you may no longer find it because it is not very suggestive for the general public. Manufacturers choose to use phrases like miniature effect, model or toy that are of route much greater explicit ...
Doing it when capturing with your digital digital camera is properly, however doing it in post-production, quietly in the front of your computer, with a little coffee, it's even better !! Indeed, doing it your self from A to Z lets in you to precisely dose and role the blur effect, the vicinity of sharpness or the saturation of colors.
Creating the miniature impact is within the reach of the sizeable majority of photo enhancing software program intended for the introduction of photomontages. The essential features that your software should have are layer management, layer mask and a filter permitting blurring.
To carry out this photomontage, I selected Photoshop Elements software. So let's see right away the way to do it…
Open the photograph to adjust then reproduction the layer (Layer / Duplicate the layer…). Add a blur effect to the upper layer (Filter / Blur / More blur). Do not hesitate to repeat this effect to have a massive blur. Name this layer “Blur”.
Add layer masks (Layer / Layer masks / Show all) to the “Blur” layer.
Take the gradient tool, choose the black color, pick out the Reflected gradient option (1) and take the black-white gradient (2).
If you use the gradient as is, the effect might be medium. Why? Because the gradient is simply too soft (that is to say the difference between the clear area and that, flawlessly blurred). You need to shorten this location to have something convincing.
To do so, double click within the gradient: a brand new window appears (see screenshot below). Now circulate the small black square (three) and the lozenge (4) to reap the equal values inside the screenshot below (80% for the place of the black square and 25% for the rhombus). Remember to name and shop your new gradient (5). You can be capable of reuse your gradient to your next images.
Place yourself at the fusion masks (the white body to the proper of the image), press the Shift key (this allows you to have a rectilinear gradient) and, with the aid of clicking and dragging, determine the place to be made clear. If you are not satisfied with the result, no want to cancel the previous action. Simply redefine the blur place (the preceding line will get replaced by way of the new one).
If essential, growth the sharpness of the layer below (Accentuation / Adjust sharpness, etc.) to besides accentuating the depth of field effect.
To have a convincing impact it's miles now necessary to make certain areas clean and others blurred. Indeed, we must no longer overlook that the photo is in 2 dimensions and that our brain, it reasons in 3 D.
In our example (see below), the top of the constructing on the proper and the lampposts have to be clean (green arrows) due to the fact these elements are within the identical plane. Conversely, the lamppost, plants, and barriers in the foreground must be blurred (blue arrow) due to the fact these factors are earlier than the area of sharpness.
The fusion mask created earlier will help you transform these well-known blurry and clear areas ...
Take the comb tool, decide its size then go to the fusion mask. Pass the areas to be blurred in white and the areas to be sharpened in black.
To have a practical miniature effect, it's miles essential to growth the color saturation as well as the brightness and the comparison.
Add the Hue / Saturation and Brightness comparison adjustment layers to your photograph (Layer / New adjustment layer / Brightness Contrast and Hue / Saturation). Do not hesitate to push the values (see screenshot below) to gain a convincing result.
Now that's enough to make any model maker jealous…
Before concluding, I attach the link to the Photographic Flickr photo gallery where you may discover different Tilt-shift outcomes that I have made.
Be aware that software program like Lightroom also allows you to create Tilt-Shift consequences (these may be a bit much less convincing, however). This can be very beneficial because you could thus don't forget creating a Time Lapse in miniature version…
Also read more,
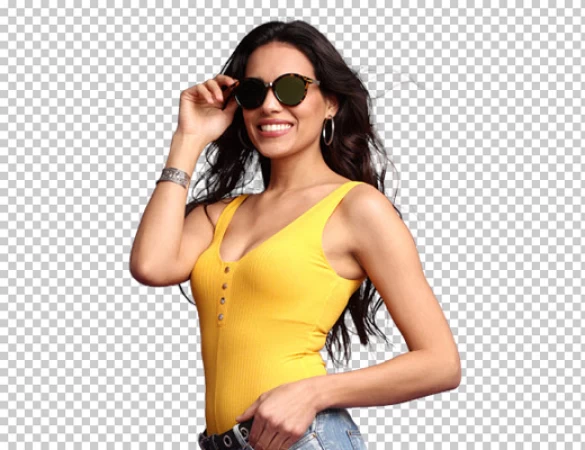
Clippingphotoindia is the top maximum popular Image masking service company in the world, we are supplying any type of protecting carrier with a better fine.
Image masking
Cut out pictures from background
Clipping path
Remove background
Retouching
Image retouching

